 We continue the Summer Bloggin' with a post from Aimee Davis of daisyeyes. Aimee shares how to do couched beaded thread. Such a wonderful technique. Check out Aimee's blog and her shop where she shares her handstitched goods.
Thank you, Aimee!
We continue the Summer Bloggin' with a post from Aimee Davis of daisyeyes. Aimee shares how to do couched beaded thread. Such a wonderful technique. Check out Aimee's blog and her shop where she shares her handstitched goods.
Thank you, Aimee!
Beaded thread is one of the coolest things I’ve come across in the years that I’ve been playing with a needle and thread. But how to use it in an embroidery design was something I had to put some thought into; not to mention where to get it or how to make it myself.
I first saw beaded thread on etsy in an amazing shop called
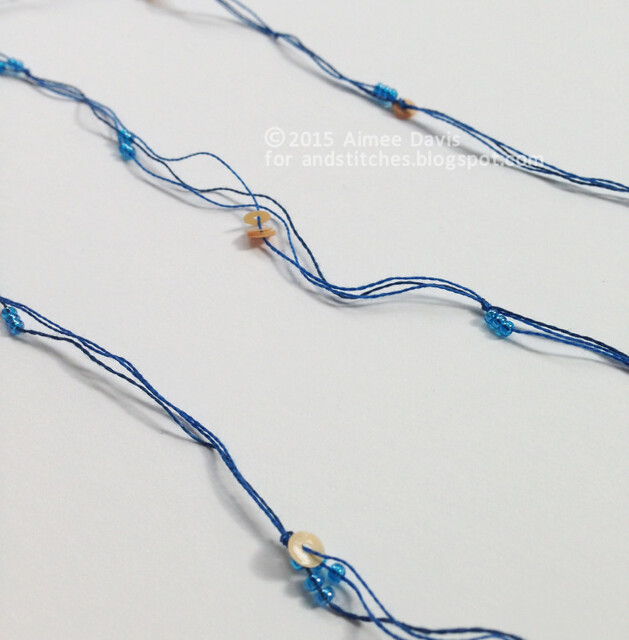
Nell’s Embroidery. Nell Burns fills her shop with amazing threads and yarns and her beaded threads are some of my favorite things to work with. But before I decided to use up some of my stash, I thought I would try to bead some thread of my own.
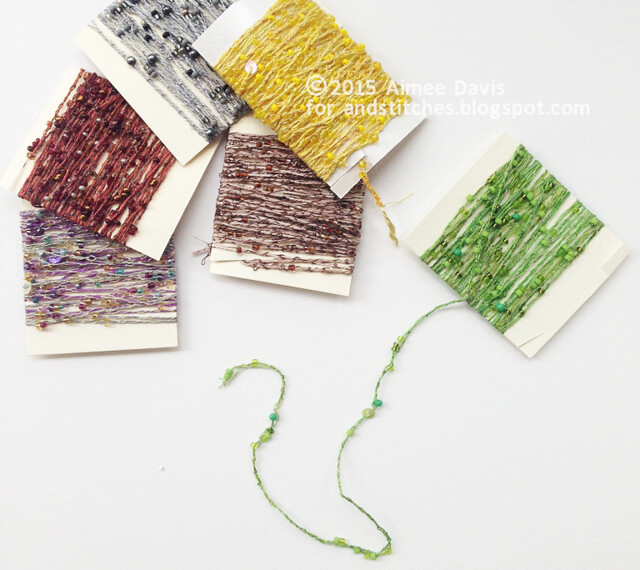
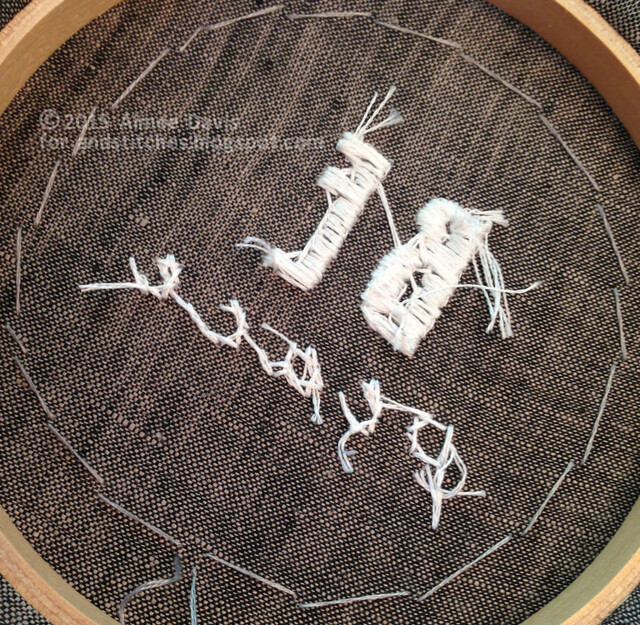
I gathered up some small seed beads I had, along with some tiny sequins. I found some coordinating floss and divided it into three strands. Having no idea what was the best way to do this, I decided to tie a knot in the end of the three strands and just go strand by strand adding beads and sequins with a needle. It was slow going and so tedious!
After I felt like I had enough beads and sequins on all three strands, I laid them out and started spreading out my beads into random spots. Then in random sections I knotted before and after some beads to keep them in place. Here’s how it turned out.
Honestly, it made me appreciate the talent Nell has and will keep me as a repeat customer. But whether you have beaded your own threads or bought some yourself - here’s what to do with it!
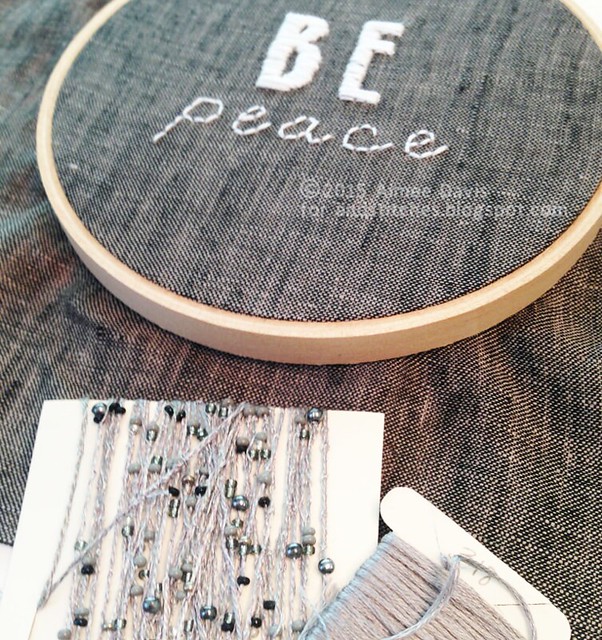
First up, gather your beaded thread and other materials. I’m using a pattern I designed last year that is made for a 5 inch embroidery hoop. You can
download the pattern here. It comes with three different versions.
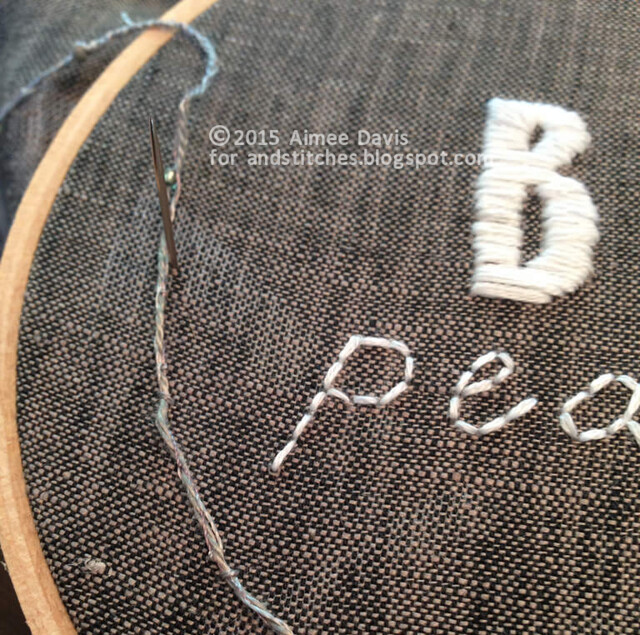
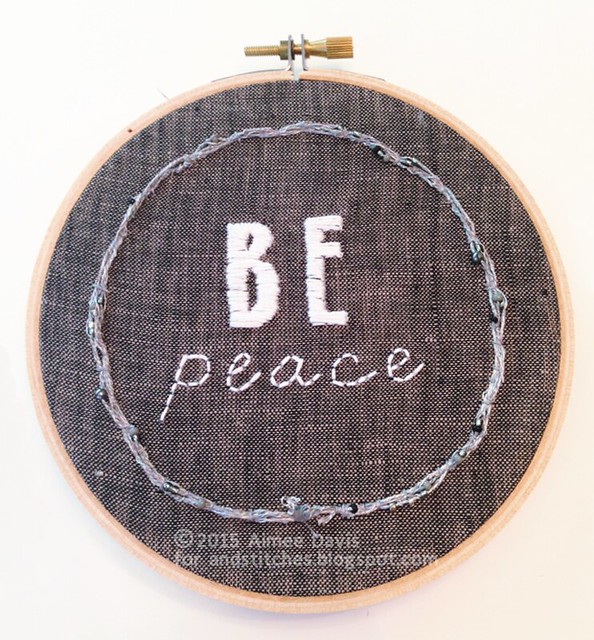
I transferred my pattern onto black linen using carbon transfer paper (Sublime Stitching’s transfer paper is the bomb) and then stitched up my text. For the outlined “BE”, I first stitched the outline with a backstitch and then filled in the letters with a satin stitch. For the “peace” I used a simple backstitch. Once your text is stitched it’s time to start couching.
Obviously beaded thread you can’t pass through fabric, so instead we are going to use small stitches called couching to attach it to our fabric. Couching threads (or wire or yarn or grass or whatever strikes your fancy) is one of the coolest embroidery stitches out there and honestly probably one of the easiest. The thing is it looks so fancy and it’s all in what you are couching. I like to use a floss that matches the beaded thread, but sometimes using a floss that is totally a different color adds a pretty incredible effect. It’s totally up to you!
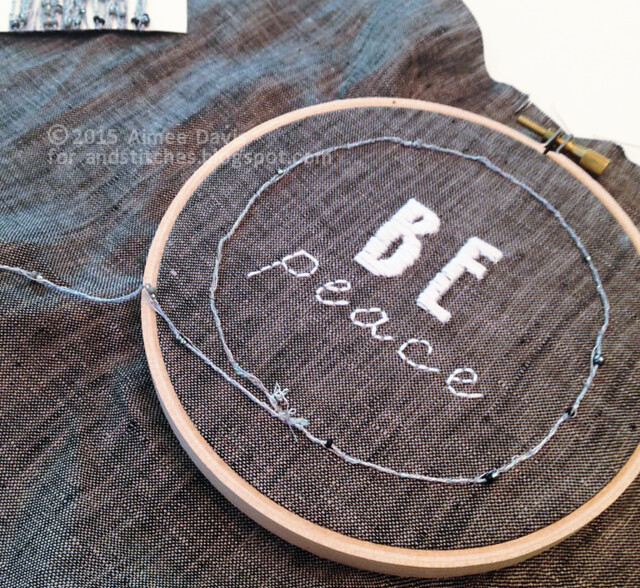
First up, if you want to trace the outline circle around your text go for it. I’m a wing it kind of stitcher so I skipped that step. Then take your beaded thread and three strands of coordinating floss and lay it out on top of your embroidery. Bring your needle up on one side of the beaded thread and pass it through on the other side.
You have basically made a little loop for your beaded thread. Pull the loop pretty tight and move up the thread about an inch or so and repeat.
Bring your needle up on one side and then pass it down on the other side of the beaded thread. You have “couched” your thread!
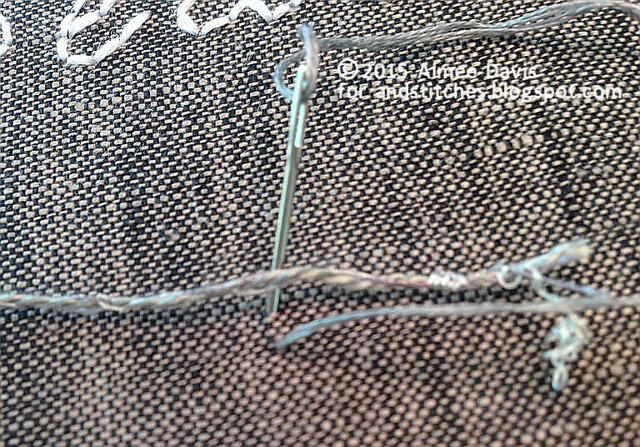
Here’s a glimpse at the back of my hoop after I went around once.
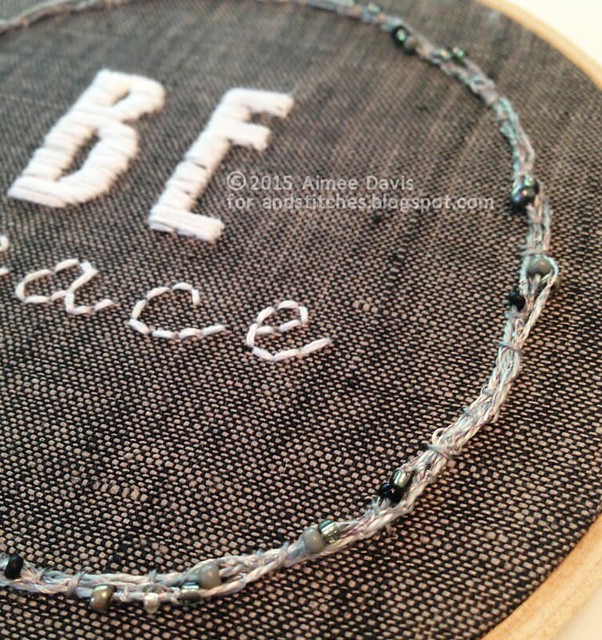
Keep going until you are back where you started. I like to go around at least 3 times with my beaded threads in order to get a fuller “wreath” effect. Don’t cut your beaded thread until you have couched around the circle as many times as you want.
When you have gone around the circle three times, I like to stitch 3 couching stitches on top of each other where my last stitch is just to make sure that it’s super tight. Then tie a knot with your embroidery floss in the back. Return to the front and snip your beaded thread off about 3/8" away from your last couching stitches.
You made it!
Finish off you hoop and enjoy your new amazing hoop art!
Have you tried couching or beaded couching? Please share in the
&Stitches Flickr group. We'd love to see it!


No comments:
Post a Comment
Hi there, thank you for stopping by &Stitches. The blog is no longer updated, but you can still explore the archive of posts. Because the blog is no longer active, new comments have been disabled. Thank you for understanding. :-)
Note: Only a member of this blog may post a comment.