
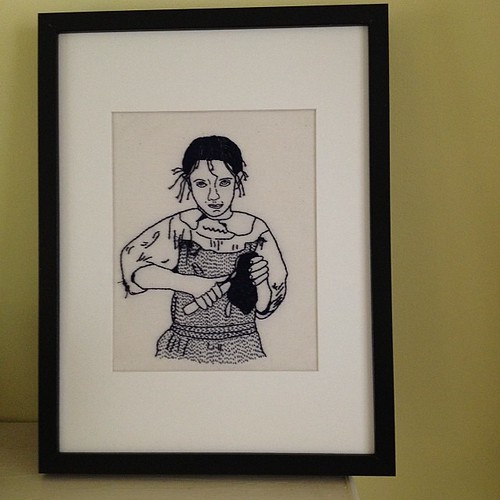
How do you finish your embroidery projects? Recently I've had to frame up a few pieces and they needed to look extra sharp. Ironing is all well and good, but sometimes it just isn't enough -- maybe the hoop has left a little indent that ironing didn't quite remove, or perhaps there is an area inside the work where there is a little bit of crinkling. Blocking your embroidery will make these all go away. Before proceeding, you will want to take care of removing any marks from your pattern transfer; if you've used a water soluble marker, for example, you will need to rinse that off and let the piece dry before blocking.
Gather materials
Grab a bunch of pins. Now grab some more. Seriously, you're going to need a lot of pins. I use straight pins when blocking, but I have seen some tutorials suggesting the use of thumbtacks. I tend to use muslin on my embroidery projects, and I've tried a thumbtack or two, but I found that they leave large holes (and I like to avoid that). If you've used a heavier linen or other fabric, it might be a different story.
Next you'll need a surface that will stand up to having lots of pins pricked into it. I have been using a large piece of foam board lately, but certainly anything like it or a cork board will do just fine. (The benefit of using a piece of foam board is that it can then be used to back the work for framing.)
Lastly, get a spray bottle of water. We're going to be spraying the whole piece. If you are worried about colorfastness, then this is not going to be the finishing method for you.
You might want to use a straight edge or level in order to square up your work to be sure things don't go slightly wonky.
Get to work
After you've gathered your materials, place the work in on your pinnable surface, and start pinning! Put one in the center of the top, and work out to a corner. Keep the edge relatively straight (Here's where you might want to use that level or a straight line. I keep things casual and have never run into trouble). Use more pins than you think are necessary. Then work from the center to the other corner.
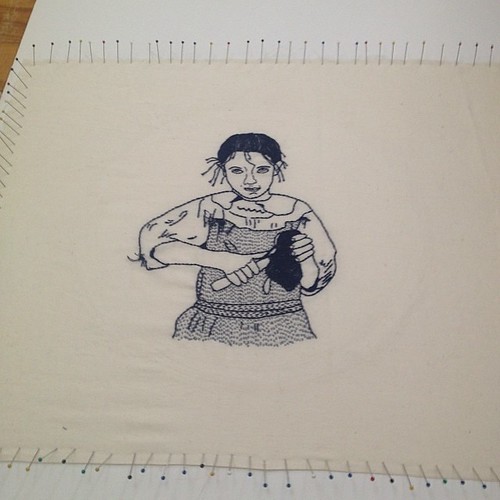
Do the same thing on the bottom: smooth the work down and place a pin in the center of the bottom edge, making sure things are tight and work out to the corners.
Repeat this again for the sides. I tend to angle my pins outward slightly, to pull things a little bit tighter.
Now that you're pinned down, mist water over everything, just enough to get things damp.
Then walk away.
When everything is nice and dry, pull out the pins and your embroidered piece should be nice and smooth!
I have never tried this before (I always lightly press finished embroideries) and I thought it was complicated but it seems very do-able to me! Thanks Jessica :)
ReplyDeleteit really is very easy. :)
DeleteGreat tutorial. Blocking your work really does give it a great professional finish.
ReplyDeleteThis is a great tutorial! I have a few pieces that have kinks from the hoops that I haven't been able to iron out, I am going to give this a try and see if it gets them flat!
ReplyDeleteThanks so much for this tutorial! Even though I've blocked knitted & crocheted pieces, somehow I thought blocking embroidery would be complicated. I tend to get little crinkly bits in the interior of the piece that won't go away when pressing from the back, and I try to get them with the tip of the iron on the front but that doesn't always work out well.
ReplyDeleteGreat tutorial! Finally got around to commentating as I've just finished having a go at blocking myself! Thanks for giving me the confidence to do this, &Stitches really does feature some great posts!
ReplyDeleteYou can see the results of my own blocking here!
http://www.theawkwardniche.co.uk/2014/05/blocking-wolfman.html