

I hope you'll all join us today in welcoming Rebecca Greco from Hugs Are Fun! Rebecca last visited us to talk about better hoop habits. Today she's here to tell us about her experiences with an LED Stitching Kit. I don't know about you guys, but I've never tried this myself, so I'm excited to hear what Rebecca has to say about it!
I have a confession to make, I am a craft supply hoarder. I love getting exciting new supplies, but actually using them makes me nervous. I obsess over finding the perfect project so I don't "waste" them. I've had this LilyPad LED stitching kit from Sparkfun for well over a year and have only just now used it.

There are kits available that allow you to program the LEDs to do things like flicker, but I just used the basic kit. The kit includes conductive thread, a battery pack, LEDs, a button, and a switch.
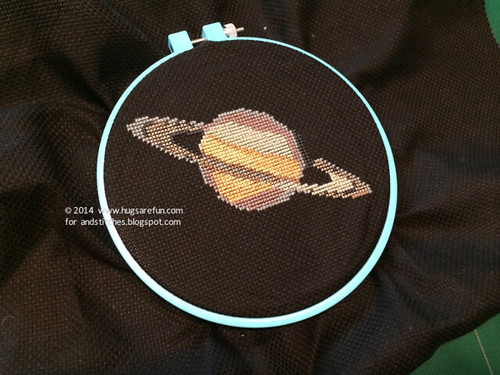
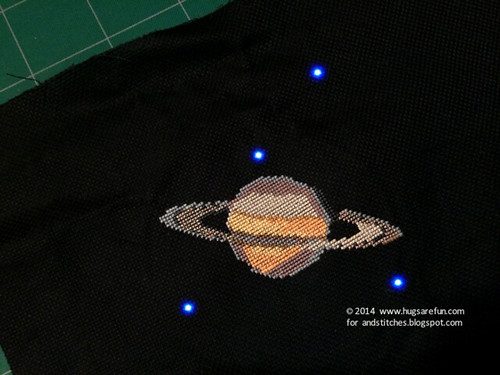
I wanted to do something space related for it, what better way to use LEDs than stitching them as stars? I finally designed a pattern of Saturn and got to work. The cross stitch was the easy part, the LEDs were much trickier than I expected and I ran into quite a few problems. The first thing I realized was that if I attached the components directly to my cross stitch it would show the stitching on the front.
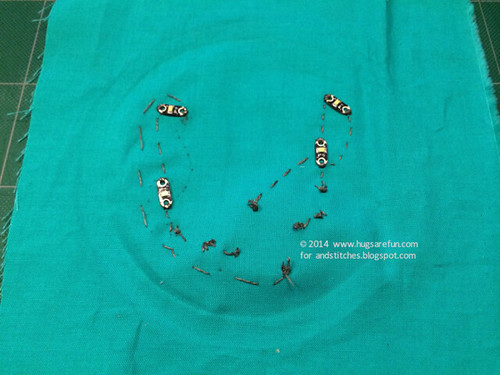
The battery pack is quite large and there are a lot of different pieces, all of which need to be stitched into place and there needs to be a string of stitches making the connection with the conductive thread. I decided to stitch everything onto a piece of fabric and attach it onto the cross stitch Aida cloth after.
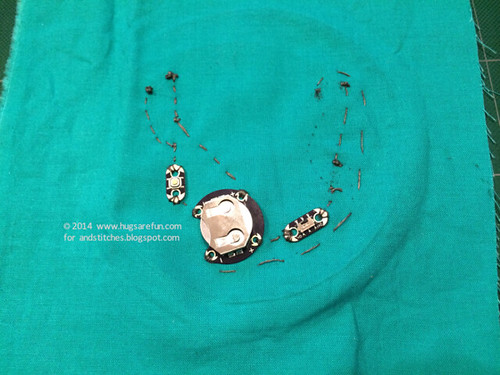
I followed the instructions on the website exactly and the button lit up two of the LEDs, but I could not get the switch working to control all of the lights. I enlisted my husband's help and he explained the changes I needed to make. I can't even count the amount of times I had to take out the stitches. The frustrating thing is not knowing if it will work until everything is stitched into place. I would finish the last stitch and cross my fingers that it would work, unfortunately more often than not I ended up having to take out the stitches and start over.
Once I finally got the LEDs working I used a needle to make the holes in the Aida cloth wider where the LED was going to be showing through. Once everything was in place I used black sewing thread to attach the fabrics together. It isn't the most ideal situation but it isn't too noticeable.

I do wish I had more LEDs to use for this, the kit came with 5 but one of them was broken when I got it. I would love to do a cross stitch of the galaxy with dozens of twinkling lights!
Have you ever tried out using an LED stitching kit? Did you find it as confusing as I did?
Wow! Just wow!
ReplyDeleteTurned out beautiful! I am really curious to try it now! You should definitely attempt the entire galaxy.
ReplyDeleteTotally worth all the aggravation! Now I want to do a bunch of stars :)
ReplyDeleteI am preparing to do a quilted wall hanging -with fireflies. The logicstics of the wiring/stitches on the back has me hesitant to even start - but I think I will get there - eventually.
ReplyDelete